Carroty Carrot Combo

I’ve tasted a couple of exceptional carrot recipes, one from Heston’s In Search of Perfection book, and one from Amass in Copenhagen. Both are amazing in their own right, but they use different techniques in preparation and cooking. So what would happen if we combined both, and chucked a couple of extra steps in just to complicate life a bit more. 

Let’s start with Amass. This restaurant has got to be on your wish list if you’re ever in Denmark, simply stunning, and there’s no smoke and mirrors, the staff happily explain the technical steps and encourage you to try at home. 

So, their carrots were first dehydrated, and then rehydrated in carrot juice, then roasted. Dehydrating and reducing the water content, then reconstitung it with carrot juice should intensify the flavour, and it really does. Does mean you use three times as many carrots and end up with… carrots, but does this make sense so far? 

This reminds me of a time I tried to create spherical olives using a calcic bath and an alginate solution of olive juice. I spent a week on this and managed to create about 6 liquid ‘olives’. Told one of my colleagues the steps it took and they looked puzzled and simply said “but you already had an olive?”

Anyway. We’d all still be bashing coconuts on rocks if we didn’t experiment a bit, am I right?


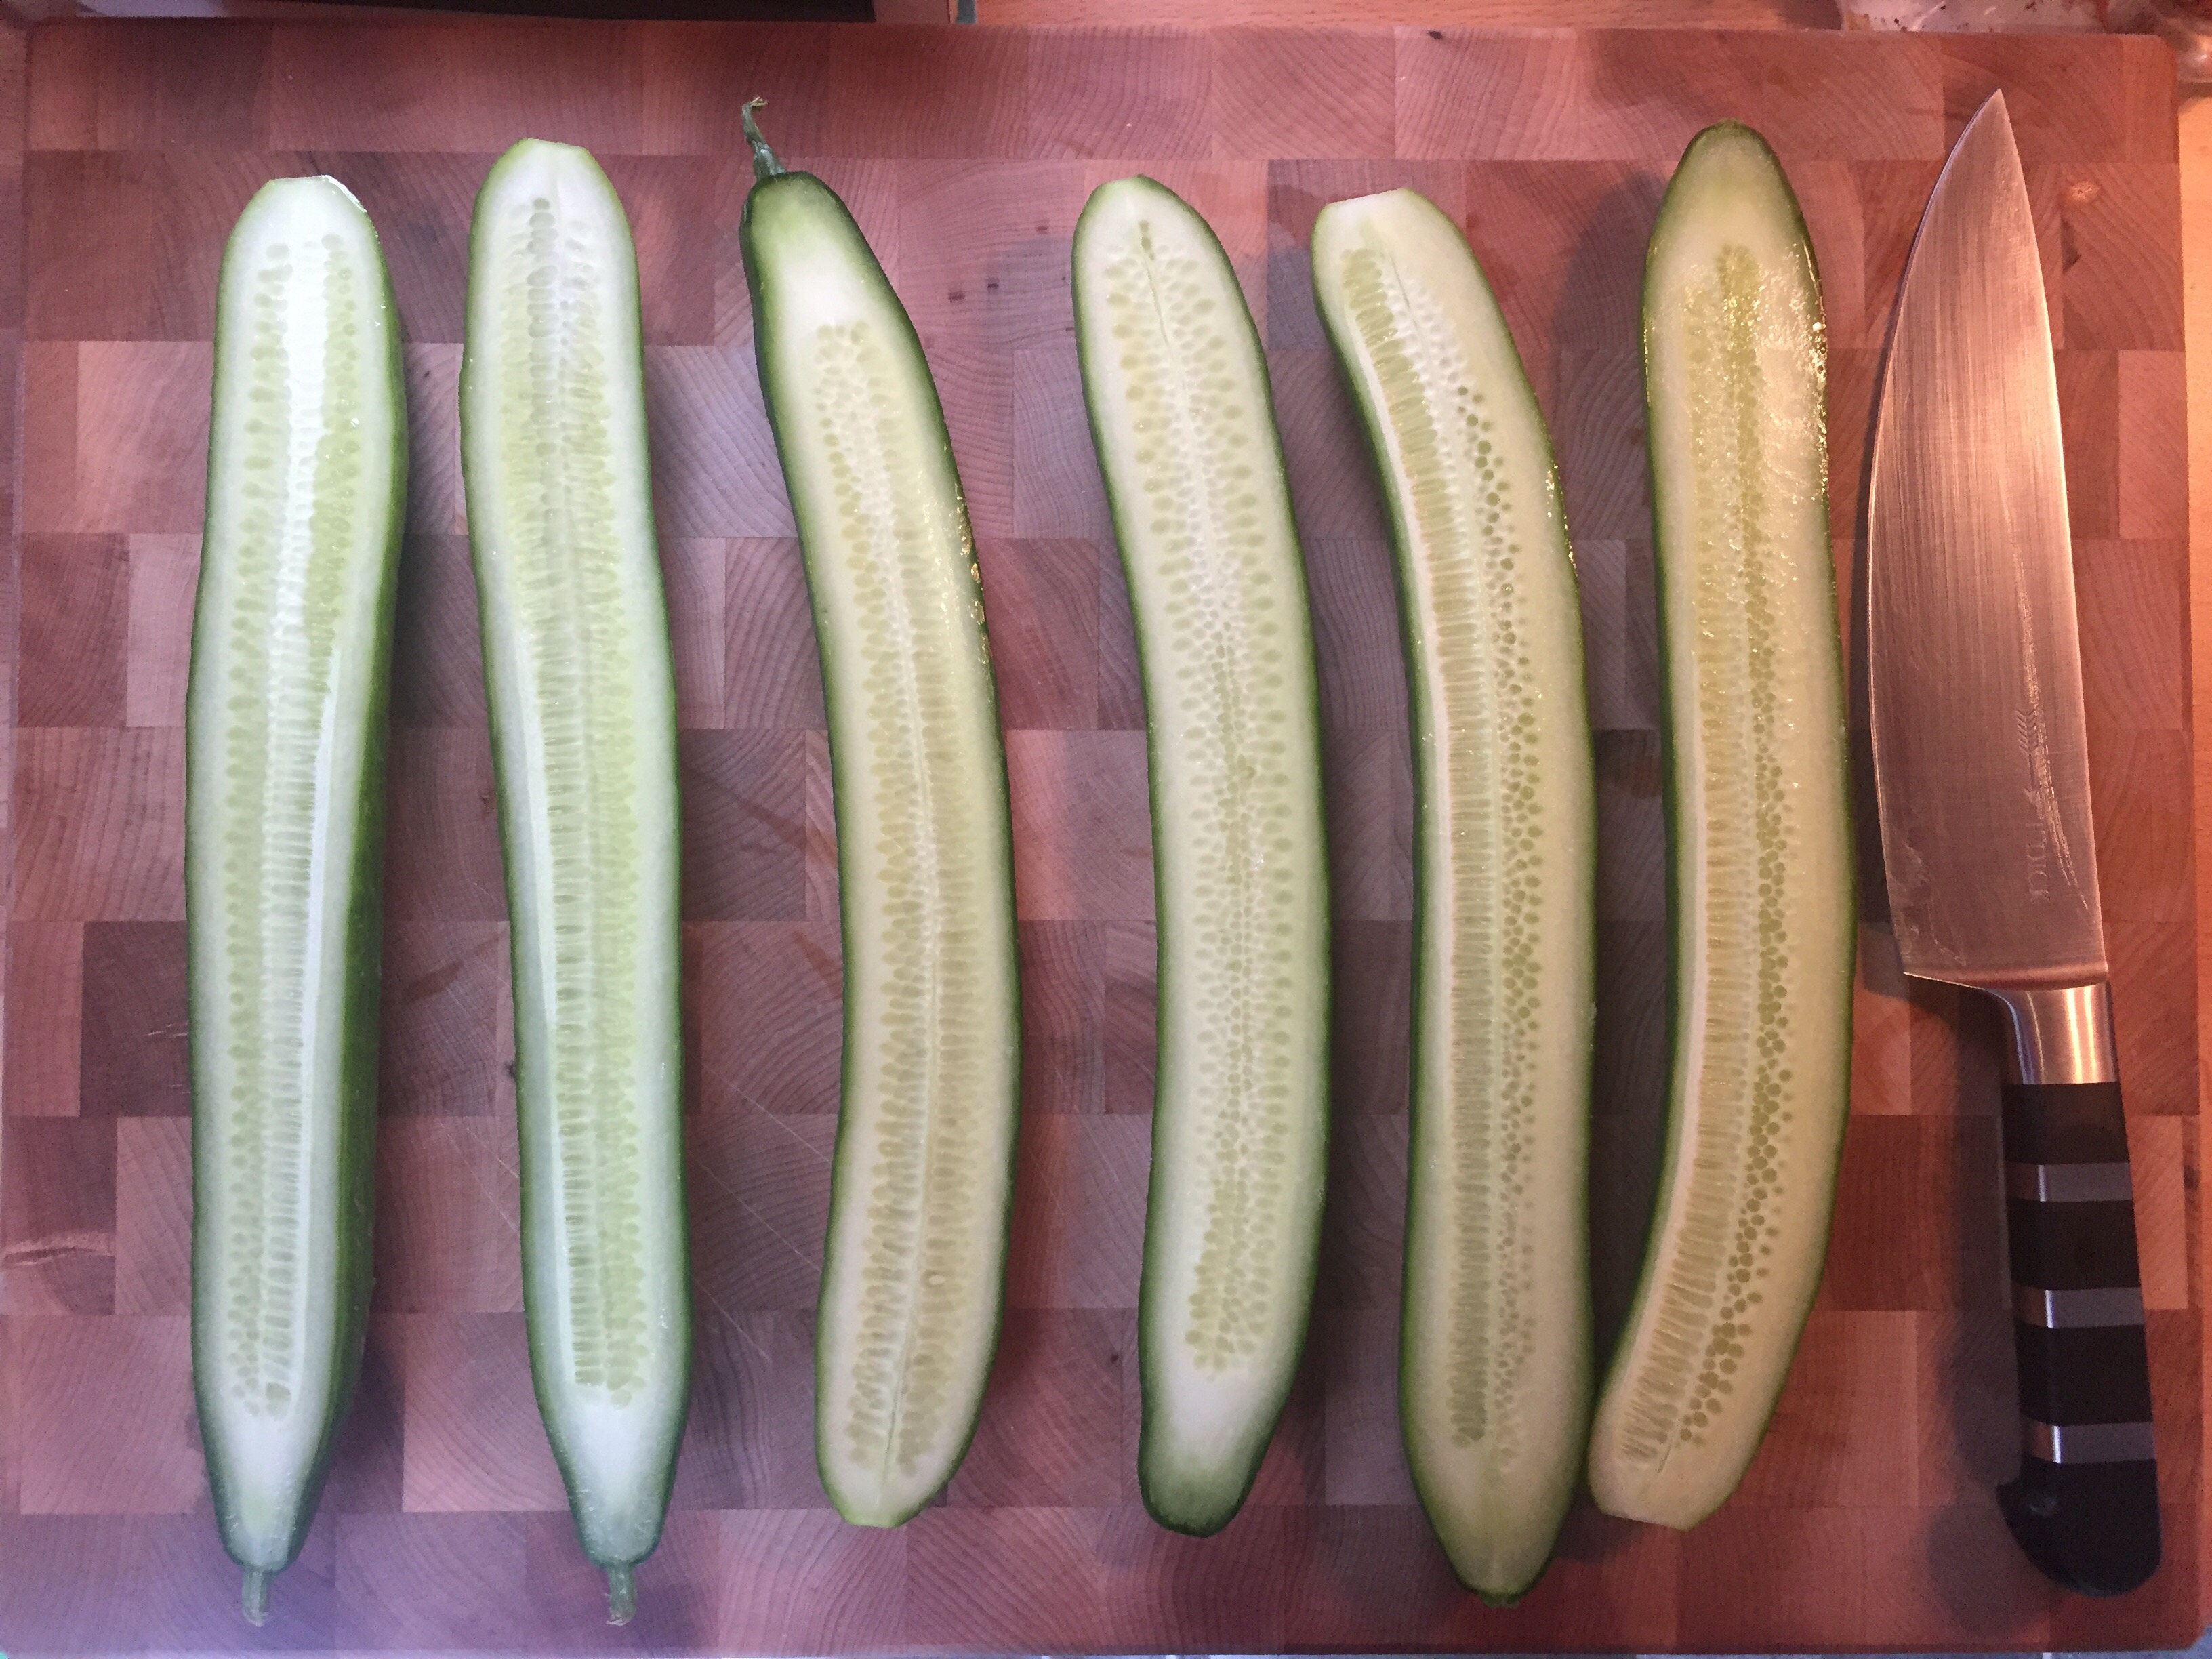
Start by dehydrating 400g trimmed carrots (serves 4). Try and get the smallest, straightest ones you can, all of a similar size, as you’ll be pan frying them whole (eventually). Wash and gently scrub if needed, but no need to peel. Dehydrate at 45degrees celsius for ten hours, checking every few hours. They’ll look pretty shrivelled and like they’ve perhaps had one too many fortnights in Benidorm, but like the six million dollar man and Lego, we can rebuild them.


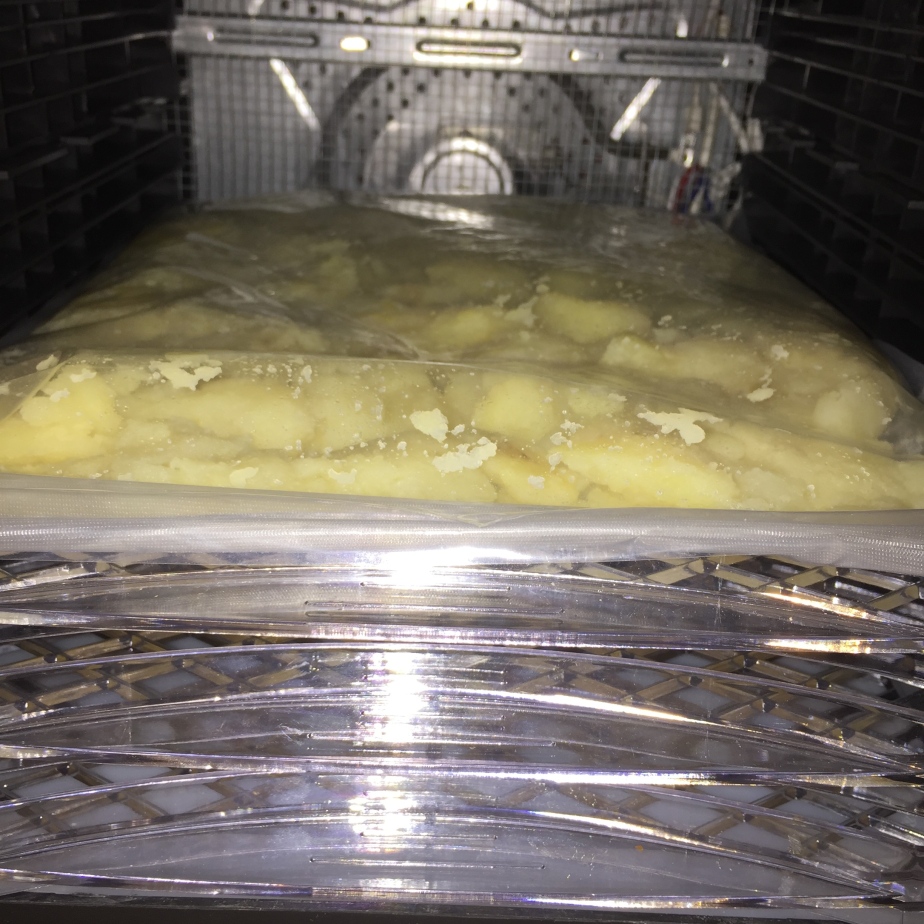
Use a juice extractor to juice 2kg of large carrots and [optional] add a few drops of pectinase to clarify the juice. Go a step further [also optional] and run it through a chemex or coffee filter to get it super clear. This clarifying and filtering isn’t essential, but the first time I tried this the carrots absorbed the carrot juice but left an unappetising slurry of fibres in the container which needed rinsing off the carrots. 

Pour the carrot juice over the dehydrated carrots and leave in the fridge at least overnight and ideally for 24 hours, until they’re plump again.

Enter Heston, stage right. Even if you can’t be bothered with the above steps, use this recipe as a game changer for your Sunday roast. Let’s call it a thank you for reading this far. Well done you. The process is very simple, cook very gently in butter, in a covered pan. That’s it. There are a few more details and a good explanation of the science in the link below. The principal difference is that cooking in water removes most of the flavour (and vitamins) as they are lost to the water. So by using butter, the flavour compounds that are leached out during cooking are retained in the oil and absorbed back into the carrots as they slowly cook. Temperature must be low, the plan is to gently cook not fry them, so will take around 30 minutes. These will taste like the sweetest carrots you’ve had, guaranteed

Heston’s Carrots

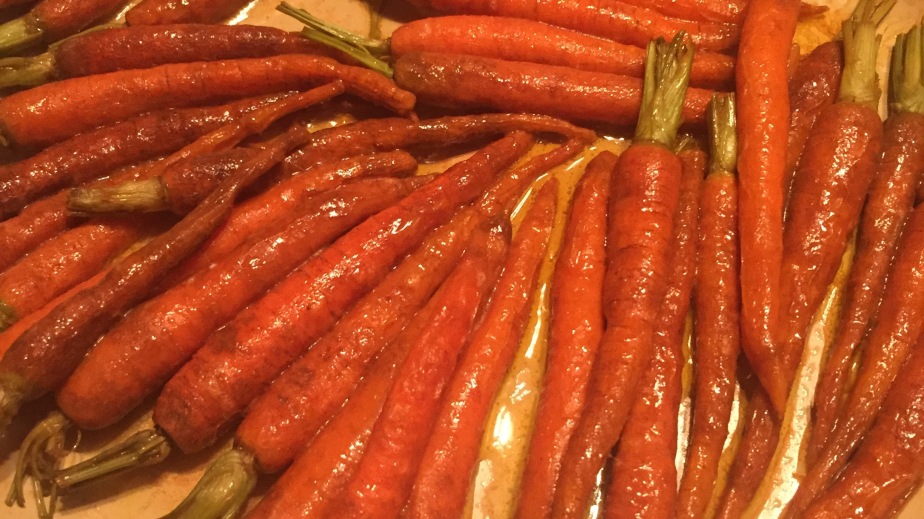
So, now our dehydrated-hydrated carrots are ready, put them in a large shallow pan in one layer (essential) with 100g of butter, cover and cook on a gentle heat for 30-45 minutes. 

  
End result is sublime. Incredibly rich, complex depth of flavour, super sweet and other than a bit of time and wasting some carrot pulp, pretty cheap too. Worth combining all the steps? I think so, both recipes are exceptional and raise a simple side dish to be the star of the plate, and combining both takes it to another level. Give it a go!


Amass, Copenhagen

Spherical Olives recipe (el bulli)

Raindrop Cake

It’s never normally too long before a Brooklyn food fad hits London, but I’m surprised I haven’t seen these anywhere in the UK yet. Back in April thanks to a few blog posts and social media, they went viral and there were queues round the block for them in Williamsburg (where else?)  Maybe my coffeeshop will be the first in the UK…. Hmmn. Baby steps though, let’s get it right at home first.

Recipe is simple enough, although a couple of ingredients were bought online. 

Start mixing 250ml spring water, with one tsp sugar and 1/2tsp Agar Agar. Stir and bring to a mild simmer until the agar has fully dissolved. Pour into a silicon mould and leave to set for an hour or so in the fridge. That’s it! I tucked a sprig of apple mint into each one, Sakura blossoms would work incredibly well, if you can get hold of them. 

  
The accompanying ingredients are Kinako and Korumitsu. Kinako is roasted soy bean powder, often used to sprinkle on Japanese desserts. Kuromitsu is a dark brown sugar syrup, like a mild thin molasses.

  
At least I hope that’s what they are and I haven’t just eaten powdered wallpaper paste and some axle grease.

End result looks and tastes great, I have perhaps used a bit too much agar, get the ratio perfect and it should be crystal clear. Best part though? The agar cake dissolves in 30 minutes. Perfect for those guests you want to clear off, sharpish. If they still don’t get the hint, make a giant one with their coats in it.


Cucumber Spice

Saw this on a Nordic food blog (link below) and thought it would be worth a go – cucumbers are cheap and the dehydrator takes up quite a bit of precious countertop space that some other gadget could be occupying. So, let’s put it to use. Since getting a dehydrator I’ve use it to prove pizza dough, ferment potatoes, slow bake lotus root chips, make kale chips (no, just no), dry tomato slices and mint leaves, but not much dehydrating at all (er, except the last two).

Anyway, the theory goes that removing all of the water content of a cucumber and grinding the dried vegetable produces a very deep, concentrated spice, more akin to the inner souks of the medina in Marrakesh than a subtle, palate cleansing yoga water ingredient, for example. It’s very bitter and pungent, and smells a bit like toasted cocoa. 

Day one.

 
Process is pretty simple, cut lengthways and that’s it. The original blog suggests peeling, but I found that produced too subtle a spice in the end. Leaving the skins on increased the overall drying time by a day or so, but produced a deep pungent powder in the end. Perfect for adding to tagines or curries, or a small amount for dusting, if you try it let me know what it pairs well with (I’m thinking lamb). Hope you’re not in a rush. Dehydrating something that is 96% water took around 4 days at 60deg celscius, which is pretty high for dehydrating.

Day two.

 Cucumbers die in hot cars, m’kay? Please think of the cucumbers.

Day four.  


Once they snap easily, break them up into small pieces and manually grind to a powder, and that’s it!


Original blog post http://nordicfoodlab.org/blog/2011/10/cucumber-powder


Fermented Potato Bread (Amass homage)


Last December we were lucky enough to get a table at Amass in Copenhagen, and we all were amazed by these fermented potato breads. The staff were great and explained the process to us to try at home. It’s pretty long winded and requires a few pieces of specialised kit, but worth it nonetheless. Apparently, we used to ferment potatoes all the time, as they contain difficult to digest acrylamides which are broken down by the fermentation. Hey, look yesterday I didn’t know what acrylamides were either, and now I’ve even used them in a sentence!

Start off by boiling 2kg of the largest floury potatoes you can find, skins on. This will take some time, probably an hour or so, so amuse yourselves for a little while. Once cooked all the way through, peel from their skins and place in a vacuum bag. add a tbsp of salt, and mash/squash pretty flat. Push as much air out of the bag as you can and vac seal. These bags are going to sit for at least ten days in a warm place fermenting so ensure it’s a strong seal, and you salted the potatoes (which kills off any bacteria). I was a little dubious about serving something that has been sitting at a bacteria bonanza temperature for a fortnight, but they all got wolfed down and if anyone died they at least had the decency not to complain afterwards.

img_8955

Place the bags in a dehydrator (or airing cupboard at a push?) at 35 degrees celsius and leave them tucked up in there for 10 days. The bag will expand due to the gases being released as the potatoes ferment – this is a good sign!

After 10-14 days remove the potatoes from the bag, weigh 1.5kg and add the following 1.2kg plain flour, 50g salt and 0.6l natural yoghurt. No yeast required as the fermented potatoes will provide a rise (and a really tangy taste). Work into a dough, cover with a damp towel/clingfilm and leave somewhere warm overnight.

Potatomass and the pit.

img_8974

Heat up the hottest surface you can, whether it’s a pizza oven, kamado grill, baking steel, pizza stone, or at a push a heavy cast iron griddle. You’re looking for temperatures above 350 degrees celsius, so pretty hot. Portion off a tennis ball sized amount and roll to 1cm thick and about the size of a side plate. The dough is quite wet, so use plenty of flour for dusting. Optional tip, chuck a handful of coarse dried polenta onto the grill before the dough to add a better crunch (this works great on pizzas too). Sear each side for a few minutes, until a darkened crust forms. Don’t move them around too much, ideally only flip once.

If using a griddle heat up a large burger press and place on top of the bread to improve contact and speed up the time for the outside to crisp up.

These taste incredible, tangy and complex, light and chewy on the inside, and a crisp crunch. Takes two weeks to do it properly, so plan well in advance!


Restaurant link: https://www.facebook.com/AmassRestaurant

Recipe link / blog post: http://aortafood.com/theres-always-a-catch/


Ratatouille Terrine (Takazawa homage)

  Aww yiss! April brings a trip to Tokyo, and hopefully with it a trip to Takazawa, one of the hottest modernist French/Japanese restaurants in the city. 

What better way to get in the mood for the trip than trying to copy one of their surgically precise signature dishes with my clumsy ambitious yet unskilled hands? 

I’ll be honest, this is the third attempt, and it’s still a crude homage to the (as yet untasted) original. But hey, given I’m making this up as I go along it’s as good as it is likely to get.

It’s a ratatouille, in micro Terrine form. Simple yeah?

Start by preparing 1/4 inch wide batons, ideally six inches long (1/2 inch shorter than the size of the Terrine, trust me) of a huge bunch of vegetables. In this attempt there are blanched carrots, purple and yellow heritage carrots, asparagus and baby corn; dashi marinated red peppers; sautéed purple sweet potatoes and courgettes

All these elements will be surrounded by cooked red cabbage which will line the mould. Take the heart out of the cabbage (if it’s large you can halve it but you’re aiming for large pieces of cabbage to line the mould in one piece) and boil for 15 mins or so in hot water and cider vinegar (if you like magic tricks, cook in plain salted water, watch it turn blue, then add vinegar and get the purple colour back, abracadabra!)
    
Cook/marinade each vegetable and arrange ready to stack into the Terrine mould. The blanching, marinating and sautéing provides a nice contrast of textures and flavours.

The magic glue that holds the whole thing together is tomato juice with gelatine. I was trying to keep this vegetarian so used agar instead (unfortunately agar doesn’t play well with acidic juices – like tomato – hence the two failed attempts. Solved by using enough agar to set a patio).

Juice enough tomatoes to yield 500ml, and add 10g of agar powder. Bring to a high simmer (essential to activate the agar) and set aside to cool a little.

Line the Terrine mould with a leaf of red cabbage (you’ll need to trim the veins to keep the cabbage as thin as possible) then add some tomato agar solution to give the first layer something to stick to. 

The Terrine mould is U shaped, so use the dashi marinated red pepper as the first layer. Add another layer of tomato juice, then pick four different vegetables to layer in, make sure to vary different colours and textures for both taste and visual effect). Push down and try and keep them as straight as possible (er, unlike my attempt) and keep building, adding a layer of tomato agar between each layer of vegetables.  Leave to set and voila! 

  
You’ll need a super sharp knife to cut it without it falling apart (another prior fail) but when sliced into 1/4 inch slices you get a fork full of Provence in your gob in one go!

Real life food Tetris. 

Restaurant link here http://www.takazawa-y.co.jp

Recipe guideline from the awesome StarChefs site https://www.starchefs.com/cook/savory/technique/ratatouille-terrine

Unfortunately most vegetables are not perfect 1/4 inch wide, 6 inch long, Terrine friendly morsels so it takes a fair bit of precise chopping. Don’t worry about wasting all the leftover peelings and odd cuts – chuck them all into a roasting pan and make your own vegetarian Demi-glacé! Recipe here from the AMAZING chefsteps site…

http://chefsteps.com/activities/umami-bomb-vegetarian-demi-glace

  
Roast for 45-60 minutes at 150deg centigrade, shuffling occasionally. 

  
Ah, that’s not a misty eyed romanticised homage to the offcuts, it’s my phone camera misting up. Oh well. Now add 2litres of water and continue to roast for another 30 minutes.

Strain the veg off (thanks lads, you’ve done your job) and reduce the stock by half. Use an immersion blender to blend in a small amount of salt and xanthan gum and my o my, you have a ridiculous rich, umami heavy Demi glacé to do with what you want. 

Two for the price of one, zero waste!